Royal Icing Consistencies: The Ultimate Cookie Decorating Hack
Alright, my fellow culinary conspirators, let’s talk royal icing. Not just any royal icing, but the *perfect* royal icing. You know, the kind that makes your decorated cookies look like they were crafted by a professional, even if your artistic skills peak at stick figures? I’m Julian, and I’m about to let you in on a secret weapon: mastering royal icing consistencies. This isn’t just a recipe; it’s the ultimate hack for ridiculously impressive results with minimal effort. Consider this your all-access pass to cookie decorating stardom. Trust me, if you want to seriously up your cookie game, nailing royal icing is where it’s at.
Why You’ll Love This Royal Icing Guide
Let’s be real, we all love a good shortcut, right? This guide is *packed* with them. Here’s why you’ll be obsessed:
- Foolproof Results: Say goodbye to royal icing fails. We’re breaking down each consistency so you get it right *every* time. No more sad, runny messes!
- Insanely Easy: We’re talking simple steps, visual cues, and a dash of my signature ‘lazy genius’ approach.
- Maximum Impact: Your cookies will look like a million bucks, even if you spent zero time stressing. Think gourmet, not homemade-gone-wrong.
- Your Secret Weapon: This is the kind of knowledge that makes people think you’re a culinary wizard. Let them wonder how you do it!
This is more than just a guide; it’s your ticket to cookie-decorating glory. So, grab your bowls, and let’s get started!
Ingredients: The Bare Necessities
Keep it simple, keep it chic. Here’s what you’ll need to whip up your royal icing masterpieces:
- Royal Icing (Base Recipe): Use your favorite recipe, whether it’s homemade or a high-quality mix. I won’t judge! The important thing is to have a solid base to work with.
- Water: This is your magic ingredient for adjusting consistencies. Use it wisely, a few drops at a time.
- Gel Food Coloring: Because no one wants boring, monochrome cookies. Gel is key for vibrant, non-watery colors.
That’s it! Seriously. Minimal ingredients, maximum impact. Now let’s get down to business.
The Royal Icing Consistencies: A Step-by-Step Guide
Here’s where the magic happens. We’re diving deep into the three essential royal icing consistencies: outlining, flooding, and detail work. Get ready to become a consistency pro!
- Prepare Your Base: Start with your chosen royal icing recipe. Make sure it’s smooth and lump-free before you divide it.
- Divide and Conquer: Divide the icing into separate bowls. The number of bowls depends on how many consistencies you need. I usually go for three: outlining, flooding, and detail.
- Outlining Consistency: The Foundation
This is your structural support, the backbone of your cookie design. You want an icing that holds its shape but is still smooth enough to pipe without breaking. The goal is for the icing to be thick enough to hold its shape when piped but thin enough to flow smoothly. It should form a soft peak when lifted with a spatula. Here’s how to achieve it:
- Add water, a few drops at a time, to one bowl of icing. Mix thoroughly after each addition.
- Test the consistency frequently. You’re looking for a ‘soft peak.’ When you lift your spatula, the icing should form a peak that gently folds over.
- If it’s too thick, add another drop or two of water. If it’s too thin, add a tiny bit more powdered sugar.
- Flooding Consistency: The Smooth Operator
This is where your cookies get that flawless, glossy finish. Flooding icing needs to be thin enough to spread easily and self-level. Achieving the perfect flood consistency is the ultimate hack for professional-looking cookies. Here’s the lowdown:
- Add water, a few drops at a time, to another bowl of icing. Mix thoroughly after each addition.
- The ’15-second flood’ is your target. Lift a spoonful of icing and let it fall back into the bowl. Count how many seconds it takes for the surface to become smooth again. A ’15-second flood’ means it takes 15 seconds.
- Adjust the water to achieve your desired flood time (typically between 10-20 seconds). The warmer the weather, the quicker you want the icing to self-level.
- If it’s too thick (takes longer than 20 seconds to smooth), add a drop or two more water. If it’s too thin (smooths out in less than 10 seconds), add a tiny bit more powdered sugar.
- Detail Consistency: The Precision Artist
For intricate details and delicate lines, you need a thicker icing that holds its shape impeccably. This is typically thicker than outlining. You may not need to add any additional water, or just a very small amount. The icing should hold very crisp lines and details when piped. Here’s the strategy:
- Start with a small amount of your base icing.
- If it’s already thick enough to hold very crisp lines, you’re good to go!
- If it’s slightly too soft, add a tiny bit of powdered sugar, mixing thoroughly.
- Coloring Your Icing: The Fun Part
Time to unleash your inner artist! Use gel food coloring to achieve your desired shades. Remember, a little goes a long way. Here’s the secret:
- Add a tiny drop of gel coloring to each bowl of icing.
- Mix thoroughly to ensure even color distribution.
- If you want a deeper color, add another drop, mixing again.
- Avoid liquid food coloring, as it can thin your icing.
- Bag It Up: Ready to Decorate
Transfer each consistency of icing to piping bags fitted with appropriate tips. Small round tips are perfect for outlining and details, while a larger round tip or no tip at all works best for flooding. Now, a pro tip:
- Keep the piping bags covered with a damp cloth or paper towel to prevent the icing from drying out. This is crucial for maintaining the perfect consistency.
And there you have it! You’re now armed with the knowledge to conquer royal icing consistencies like a boss. Let the decorating games begin!
Pro Tips for Royal Icing Success
Want to take your royal icing skills to the next level? Of course, you do! Here are a few insider tips:
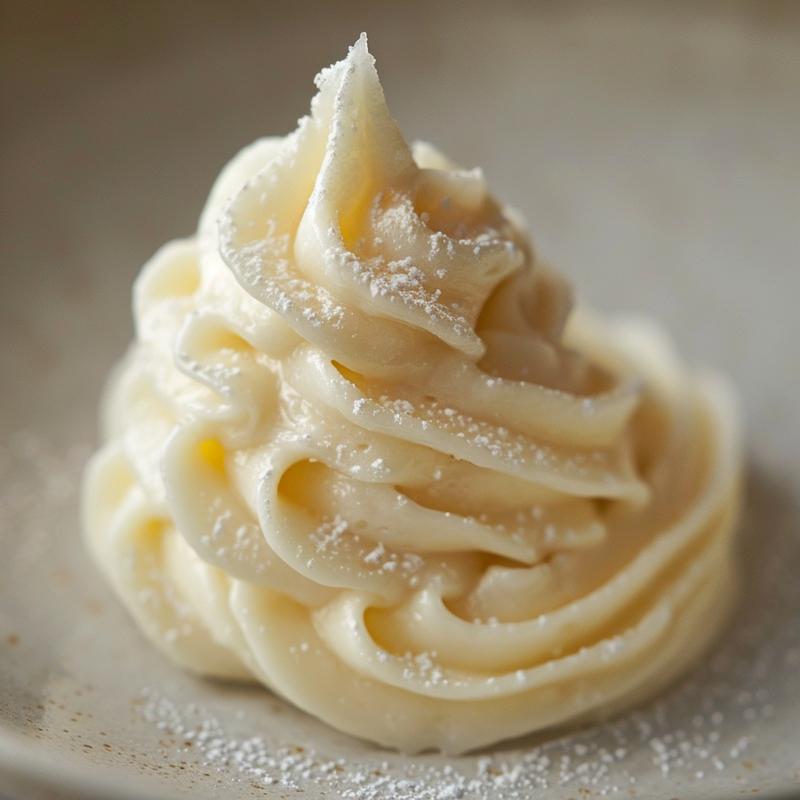
- Visual Measuring: Forget precise measurements. Learn to ‘see’ the consistency. The photos above are your guide!
- The Photos Above: Pay close attention to the photos above for visual cues. They’re your best friend in this process.
- Consistency Outline: Always start with your outlining consistency. It provides the structure for your design.
- Outline And: Don’t be afraid to experiment! The outline and flood technique is a classic for a reason.
- Thick Flood: A slightly thicker flood consistency is ideal for intricate designs.
- Thin Flood: A thinner flood consistency is perfect for large, smooth areas.
- Piping Consistency: Practice your piping consistency on parchment paper before decorating your cookies.
- If You: If you make a mistake, don’t panic! Royal icing is surprisingly forgiving.
- It S: It’s always better to start with thicker icing and gradually thin it out.
- Icing Is: Icing is a science, but it’s also an art. Don’t be afraid to get creative.
- You Ll: You’ll find your groove with practice. Don’t get discouraged if your first batch isn’t perfect.
- You Re: You’re on your way to becoming a royal icing master!
Common Royal Icing Mistakes (and How to Avoid Them)
Even the best bakers make mistakes. Here’s how to dodge the most common royal icing pitfalls:
- Icing Too Thin: The fix is simple: add a tiny bit more powdered sugar. Mix thoroughly until you reach the desired consistency.
- Icing Too Thick: Add water, a few drops at a time, until you achieve the right consistency.
- Air Bubbles: Gently tap your piping bag on the counter to release air bubbles before piping.
- Clogged Tips: Use a toothpick or scribe tool to clear any clogs in your piping tips.
- Drying Out: Keep your icing covered with a damp cloth or paper towel to prevent it from drying out.
Royal Icing Variations: Spice It Up!
Feeling adventurous? Try these fun variations:
- Lemon Royal Icing: Add a teaspoon of lemon juice for a zesty twist.
- Vanilla Royal Icing: Use vanilla extract instead of water for a classic flavor.
- Almond Royal Icing: Add a few drops of almond extract for a nutty flavor.
- Chocolate Royal Icing: Add cocoa powder for a rich, chocolatey icing.
Storage: Keeping Your Icing Fresh
Royal icing can be stored at room temperature for up to two weeks. Keep it in an airtight container to prevent it from drying out. If the icing separates, simply stir it back together before using.
Royal Icing FAQ: Your Burning Questions Answered
Still have questions? I’ve got answers!
- Can I freeze royal icing? Yes! Store it in an airtight container for up to three months. Thaw completely before using.
- How do I fix grainy royal icing? Make sure your powdered sugar is fresh and finely ground. Sifting it before using can also help.
- Why is my royal icing cracking? This can happen if the icing is too thick or if the cookies are over-baked.
- Uses Are: The uses are endless. If you can dream it, you can decorate it!
- Flood Uses: Flood uses are great for a smooth canvas before adding details!
Serving Suggestions: Show Off Your Masterpiece
Your beautifully decorated cookies deserve to be showcased! Here are a few ideas:
- Gift Boxes: Package your cookies in elegant gift boxes for a thoughtful present.
- Cookie Platters: Arrange your cookies on a decorative platter for a stunning centerpiece.
- Cookie Favors: Wrap individual cookies in cellophane bags for party favors.
For St Patrick’s Day, consider these serving suggestions:
- Decorated Cookies St Patricks Day
- Royal Icing St Patricks Day Cookies
- St Patrick’s Day Cookies Royal Icing
- Four Leaf Clover Decorated Cookies
- Four Leaf Clover Cookies Royal Icing
- St Patricks Day Royal Icing Cookies
- Shamrock-shaped Cookies With Gold Accents
- St Patrick Day Cookies Royal Icing
- Gold-trimmed Shamrock Cookies
So, there you have it! The ultimate guide to royal icing consistencies. Now go forth and create some cookie magic! And remember, it’s all about having fun and embracing your inner lazy genius. Cheers! 🥂

Royal Icing Consistencies
Ingredients
Method
- Prepare base royal icing.
- Divide icing into bowls for each consistency.
- For outlining: Add water gradually until thick but smooth.
- For flooding: Add water gradually to achieve a 10-20 second flood.
- For detail: Use thicker icing, adding minimal water if needed.
- Color each bowl as desired.
- Transfer to piping bags with appropriate tips.
- Keep piping bags covered to prevent drying.
Notes
Loved this recipe? Save it to your favorite Pinterest board so you can easily find it later! ✨